Zipscan.co.uk https://www.zipscan.co.uk Explore the digital universe in depth Sat, 29 Nov 2025 06:01:02 +0000 en-GB hourly 1 https://wordpress.org/?v=6.9 https://www.zipscan.co.uk/wp-content/uploads/2025/11/cropped-backend_9382097-32x32.png Zipscan.co.uk https://www.zipscan.co.uk 32 32 Top 10 Must-Have Software to Optimise Your PC (and Avoid the Most Common Breakdowns) https://www.zipscan.co.uk/top-10-must-have-software-to-optimise-your-pc-and-avoid-the-most-common-breakdowns/ https://www.zipscan.co.uk/top-10-must-have-software-to-optimise-your-pc-and-avoid-the-most-common-breakdowns/#respond Sat, 29 Nov 2025 05:40:07 +0000 https://www.zipscan.co.uk/top-10-must-have-software-to-optimise-your-pc-and-avoid-the-most-common-breakdowns/ Let’s be honest : when your PC starts behaving weirdly – fans spinning like a jet engine, apps freezing out of nowhere, that tiny delay when you open Chrome – it’s usually a sign that something’s off. And most of the time, it’s not a dramatic hardware failure… it’s just a lack of good tools to keep everything clean, fast and healthy. Today, I’m sharing my Top 10 must-have software to optimise your PC and avoid those annoying, totally preventable breakdowns.

Before diving in, quick note : if you like digging deeper into PC fixes and simple troubleshooting, I once stumbled on https://mon-ordi.info while searching for a RAM issue at 2 AM – super handy when you want explanations that don’t sound like a physics exam.

1. CCleaner – still the king of quick clean-ups

I know, everyone talks about CCleaner… but honestly, it’s still one of the easiest ways to declutter temp files, browser junk and apps you forgot you installed back in 2018. The interface is ridiculously simple. Two clicks and you free up a few GB – which always feels oddly satisfying.

2. Malwarebytes – your safety net against suspicious stuff

If there’s one tool I install on every friend’s PC, it’s this one. Malwarebytes catches all the sneaky junk that regular antivirus tools miss. Last month, it found a bunch of “potentially unwanted programs” on a colleague’s laptop… the kind installed silently during a random driver update. Scary.

3. Recuva – for that file you deleted “by accident”

We’ve all done it. You empty the Recycle Bin, and then… panic. Recuva has saved me twice – once for a half-finished graphic design project, and once for a folder of holiday photos from Brighton I thought were gone forever. It’s free, light and way easier than it looks.

4. CrystalDiskInfo – check the health of your drive before it dies

Hard drives don’t just die randomly. They warn you. CrystalDiskInfo is that friend who says “hey, your disk is acting funny” before you lose everything. I check it every couple of months – takes 30 seconds, and it’s honestly one of the best habits you can pick up.

5. Autoruns – see what really starts with Windows

Windows loads way more things at startup than you’d ever expect. Autoruns gives you the full list – the real list, not the polite one Windows shows in Task Manager. It’s incredibly powerful, though maybe a bit overwhelming at first. But wow does it make your system boot faster.

6. BleachBit – like CCleaner, but sharper (and open-source)

If you want something transparent and no-frills, BleachBit is fantastic. It digs deep, especially in system caches. I tried it after someone on Reddit swore it recovered nearly 5 GB from Chrome. Sounded exaggerated… but they were right.

7. Speccy – the best snapshot of your system

Ever needed your exact motherboard model or RAM speed and couldn’t remember ? Speccy gives you everything – hardware, temps, details you didn’t even know existed. Super useful when diagnosing slowdowns or planning upgrades.

8. Defraggler – if you’re still using an HDD, this is gold

Yeah, SSDs don’t need defrag anymore, but HDD users ? Defraggler is still one of the smoothest, safest tools to reorganise data and get a noticeable speed bump. I tested it once on a 10-year-old drive from an old office PC – it genuinely felt less sluggish afterwards.

9. Driver Booster – because outdated drivers are chaos

Drivers are such a pain to update manually. Driver Booster automates the whole thing and backs up current versions in case something breaks (it happens… often). It’s especially good for fixing audio glitches and weird device errors.

10. Windows Security (built-in) – don’t overlook it

Funny thing : many users install heavy antivirus suites without realising Windows already has a solid one built in. Windows Security is lightweight, regularly updated and way less intrusive than some paid tools. Combine it with Malwarebytes, and you’re basically covered.

Bonus tip : keep things simple

You don’t need 40 tools running in the background. Honestly, 3 or 4 from this list are enough to keep your PC running fast and healthy. What matters most is using them regularly. Even a quick monthly clean-up makes a huge difference.

So, which of these tools have you already tried ? And which one are you installing first ?

]]>
https://www.zipscan.co.uk/top-10-must-have-software-to-optimise-your-pc-and-avoid-the-most-common-breakdowns/feed/ 0
Slow Wi-Fi at Home: 10 Concrete Tips to Improve Your Internet Connection https://www.zipscan.co.uk/slow-wi-fi-at-home-10-concrete-tips-to-improve-your-internet-connection/ https://www.zipscan.co.uk/slow-wi-fi-at-home-10-concrete-tips-to-improve-your-internet-connection/#respond Tue, 25 Nov 2025 13:57:22 +0000 https://www.zipscan.co.uk/slow-wi-fi-at-home-10-concrete-tips-to-improve-your-internet-connection/ Slow Wi-Fi at home can ruin a perfectly good day. You’re trying to join a video call, Netflix se fige, someone dans le salon crie “it’s lagging again !”, and suddenly your cosy evening turns into a troubleshooting session. If you’ve ever walked around your house with your laptop in mode “Wi-Fi divining rod” à la “here it works, here it doesn’t”, you’re not alone.

Before you throw your router out the window, good news : in a lot of cases, a slow internet connection at home can be fixed (or at least seriously improved) with a few very concrete tweaks. Some prennent 2 minutes, d’autres demandent un peu plus de motivation. And if you like digging deeper into tech topics, sites like https://www.largoinformatique.com can also help you better understand the hardware and software side of things.

1. Restart your router… but do it properly

I know, “have you tried turning it off and on again ?” sounds like a joke. But with home networks, it’s often the first real fix. Your router is basically a tiny computer that runs non-stop : over time it accumulates bugs, memory leaks, small glitches. A quick restart clears a lot of that.

How to restart the right way :

  • Unplug the router (and the fibre/DSL modem if you have one) from the power outlet.
  • Wait at least 30 seconds. Yes, really wait. This lets the capacitors discharge and the memory reset properly.
  • Plug the modem back in first, wait until all its lights are stable.
  • Then plug the router back in and wait 1–2 minutes.

It’s basic, but I’d say 1 time out of 3, this alone gives a noticeable boost. If you find yourself doing this every single day though, that’s not normal – keep reading, something else is wrong.

2. Move your router : location matters more than people think

If your router is hiding behind the TV, under a metal desk or in a cupboard next to the electricity panel… honestly, you’re sabotaging your own Wi-Fi. Radio waves hate obstacles, especially metal, concrete and water (yes, water – think thick walls or even a giant aquarium).

Good placement rules of thumb :

  • Put the router as central as possible in your home, not in the far corner of a room.
  • Elevate it : on a shelf or high piece of furniture, not on the floor.
  • Keep it away from big metal objects (fridge, radiators, PC tower) and thick concrete walls.
  • Avoid piling other electronics on top (game consoles, hard drives, etc.).

If your Wi-Fi is awful in your bedroom but the box is locked away in the hallway behind two walls, that’s probably half the problem already. Try changing its position for one evening ; it’s a bit annoying to move cables, but you feel the difference pretty quickly.

3. Check who (and what) is using your Wi-Fi

Sometimes your connection isn’t “slow” – it’s just busy. Between the smart TV streaming 4K, the console downloading a 90 GB game, your phone syncing photos and the neighbour who maybe “borrowed” your Wi-Fi, the bandwidth can melt away fast.

What you can do :

  • Log into your router’s admin page (often something like 192.168.0.1 or 192.168.1.1, written on a sticker under the box).
  • Find the list of connected devices. You’ll see phones, laptops, TVs, and sometimes weird names.
  • Deactivate or rename devices you don’t recognise, and change your Wi-Fi password if in doubt.

While you’re at it, make sure you’re using a strong password (at least 12 characters, mix of letters, numbers, symbols). Open or super-simple Wi-Fi like “wifi1234” is an open bar. And if someone is streaming all day on your network, your Zoom call will obviously struggle.

4. Use the right Wi-Fi band (2.4 GHz vs 5 GHz)

Modern routers usually broadcast two Wi-Fi networks :
2.4 GHz and 5 GHz.

  • 2.4 GHz: slower but reaches farther and penetrates walls better.
  • 5 GHz: faster but with a shorter range, more sensitive to obstacles.

If you’re right next to the router, I personally always try to connect to the 5 GHz network for better speeds. If you’re two rooms away, in the attic or behind thick walls, 2.4 GHz might actually be more stable even if it’s slightly slower on paper.

Some routers combine both under one name and decide automatically. If your connection keeps jumping between “great” and “awful”, you may want to split them into two separate Wi-Fi names in the settings and choose manually for each device.

5. Change your Wi-Fi channel to avoid interference

Imagine everyone in your building is talking on the same radio frequency at the same time – that’s basically what happens when all routers nearby use the same Wi-Fi channel. Result : interference, collisions, and your speed goes down.

On 2.4 GHz, the “cleanest” channels are usually 1, 6 and 11. On 5 GHz there’s more choice and it’s often less crowded.

What you can try :

  • Open your router admin panel.
  • Look for “Wireless” or “Wi-Fi settings”.
  • Switch the channel from “Auto” to 1, 6 or 11 on 2.4 GHz, test each for a day.
  • On 5 GHz, try a different channel if yours feels unstable.

It’s a bit geeky, I admit, but I’ve seen apartments where just changing channel multiplied the speed by 2. When your neighbour’s box is literally 2 meters away through the wall, it makes a difference.

6. Use Ethernet where it makes sense

Wi-Fi is super convenient, but it will always be less stable than a cable. For devices that don’t move – like your desktop PC, TV, or game console – plugging them directly into the router with an Ethernet cable is a small game-changer.

Benefits :

  • You free up Wi-Fi bandwidth for laptops and phones.
  • You get lower latency (great for online gaming or video calls).
  • You avoid random signal drops and interference.

A 10–15 metre Ethernet cable along the skirting board is not glamorous, but honestly, if you’re working from home or gaming a lot, it’s worth the 20–30 minutes of installation.

7. Update your router firmware and your devices

We often update our phones and laptops, but almost nobody thinks about the router. Yet manufacturers regularly release firmware updates that fix bugs, improve stability and sometimes even boost performance.

Steps in short :

  • Log into your router admin page.
  • Look for something like “Firmware”, “Update”, “Maintenance”.
  • Launch a check for updates and follow the instructions.

Do the same for your main devices : Windows, macOS, Android, iOS, smart TV… An outdated Wi-Fi driver on a laptop can make it behave like it’s from 2010, even if your connection is fine.

I’ve already seen a laptop go from 20 Mbps to 200 Mbps just after updating the network driver. No magic, just software catching up with the hardware.

8. Tidy up your Wi-Fi settings : security, guest network, QoS

Inside that box with blinking lights, there are a few settings that can help you take back control of your connection.

  • Security: use at least WPA2, ideally WPA3 if available. Avoid WEP or “open” networks.
  • Guest network: if friends, neighbours or clients often use your Wi-Fi, create a separate guest network with its own password. That way their devices don’t interfere with your main network or your internal devices.
  • QoS (Quality of Service): some routers let you prioritise traffic (for example, giving priority to video calls or streaming over downloads). If your box supports it, it’s worth spending 10 minutes to configure.

I’m not saying you should dive into every obscure option, but taking an evening to clean up the basics in the settings can turn a messy network into something much more predictable.

9. Extend your Wi-Fi : repeater, CPL/Powerline or mesh ?

If you live in a house with thick walls, a long corridor, or several floors, one single router in a corner probably can’t cover everything. In that case, you may need to extend the network physically.

Main options, in simple terms :

  • Wi-Fi repeater: cheap, plugs into a socket, repeats your existing Wi-Fi. Easy but can cut your speed in half if it’s badly placed.
  • Powerline (CPL) adapters: they use your electrical wiring to bring the network from one room to another. Great in some houses, less in others if the installation is old or noisy.
  • Mesh Wi-Fi system: several small access points that create one large, seamless network. More expensive, but frankly the most comfortable solution in big houses or duplex apartments.

If you’re constantly seeing “one bar” of Wi-Fi in your bedroom or your home office, you’re not going to fix that with a setting. That’s where this kind of hardware becomes really useful.

10. Test your real speed and compare with your plan

Before blaming Wi-Fi, it’s good to know what speed actually arrives at your home. A quick online speed test (on a wired computer, if possible) will show you three key numbers :

  • Download speed (what matters for streaming, loading pages, downloading files).
  • Upload speed (important for sending files, video calls, online gaming).
  • Ping/latency (the reaction time of your connection ; lower is better).

Compare these results to what your ISP promised. If you’re paying for “up to 300 Mbps” and you consistently get 20 Mbps plugged in directly to the router, there’s clearly a problem on their side (or on the line). On the other hand, if your wired connection is fast but Wi-Fi is slow, the issue is inside your network.

Tip : run several tests at different times of the day. Evening peaks (around 8–10 pm) can be slower, especially in dense areas where a ton of people are online at the same time.

11. When to call your ISP or change plan

Sometimes you’ve done everything “right” at home and it’s still sluggish. In that case, yeah, it’s time to talk to your internet provider.

Before you call :

  • Note down your speed test results (date, time, wired or Wi-Fi).
  • Check if there are known outages in your area (they often mention it in customer areas or via automated messages).
  • Have your customer number and model of router handy.

On the phone, stay calm but firm : explain that you tested via cable, at several times, and that the speed is much lower than advertised. Sometimes they can run diagnostics, reset things on their side or even offer a new router if yours is old.

And if you’re stuck with an ancient ADSL line and have the option to upgrade to fibre or a more modern plan, honestly, it’s worth it. There’s only so much you can do to optimise a connection that’s fundamentally limited by the technology behind it.

Wrapping up : don’t accept slow Wi-Fi as “normal”

A slow Wi-Fi connection at home isn’t a fatality. In many cases, it’s a mix of small things : bad placement of the router, too many devices, outdated firmware, interference with neighbours, or just the wrong hardware for your type of home.

If you want a quick action plan, I’d do this in order :

  1. Restart the router and modem properly.
  2. Move the router to a better, more central location.
  3. Check who’s connected and secure the Wi-Fi with a strong password.
  4. Test both 2.4 GHz and 5 GHz, and maybe change channels.
  5. Plug in fixed devices via Ethernet.
  6. Update firmware and drivers.
  7. Consider a repeater, powerline kit or mesh system if your home is large.
  8. Run proper speed tests and, if needed, push your ISP to act.

It’s a bit of work at the beginning, but once everything is set up, you can finally enjoy stable Wi-Fi in the kitchen, on the sofa and even in that infamous corner of the bedroom where the signal always used to die. And that, honestly, changes your daily life more than we like to admit.

]]>
https://www.zipscan.co.uk/slow-wi-fi-at-home-10-concrete-tips-to-improve-your-internet-connection/feed/ 0
NAS server for beginners: what it’s for and how to choose the right one for your backups https://www.zipscan.co.uk/nas-server-for-beginners-what-its-for-and-how-to-choose-the-right-one-for-your-backups/ https://www.zipscan.co.uk/nas-server-for-beginners-what-its-for-and-how-to-choose-the-right-one-for-your-backups/#respond Tue, 25 Nov 2025 13:55:11 +0000 https://www.zipscan.co.uk/nas-server-for-beginners-what-its-for-and-how-to-choose-the-right-one-for-your-backups/ 
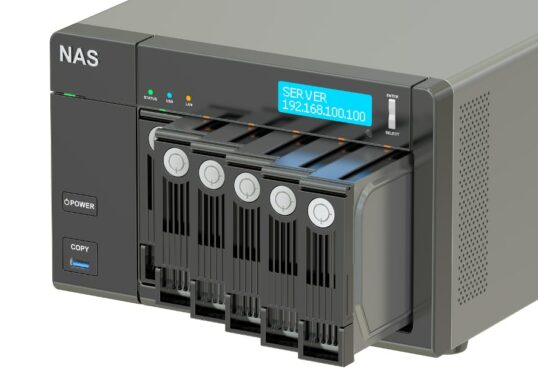
If you’re googling “NAS server for beginners” there’s a good chance you’re tired of juggling USB drives, random folders called “Backup_final_final_v2” and that one laptop that still has all the family photos on it. I get it. A NAS looks like a mysterious little box with blinking LEDs, but in reality it’s just a smart way to keep your files safe, tidy and accessible from anywhere at home (and sometimes outside). Let’s unpack all that without going full engineer mode.

If you like to dig into hardware details, but maybe feel more comfortable reading some resources in French, you can also check https://www.le-materiel-informatique.fr for extra context on components and storage gear, then come back here to connect the dots on how a NAS fits into a real backup strategy.

What is a NAS server, in plain English ?

A NAS (Network Attached Storage) is basically a small box with one or more hard drives inside, plugged into your router instead of directly into your computer. Instead of “one external drive per PC”, you have one central storage space for the whole house or small office.

Picture it like this : a shoebox-sized mini server sitting next to your Internet box in the living room. It stays on (quietly, ideally), it appears on your network like another computer, and everyone on the Wi-Fi can access it : you, your partner, the kids, even that old desktop in the corner that refuses to die.

Technically, it’s a very light form of server : it runs a small operating system, has its own apps, and talks standard protocols like SMB (Windows file sharing), AFP/SMB for macOS, sometimes even NFS, FTP, WebDAV… but honestly, as a beginner you don’t need to know those acronyms right now. What matters is : it shows up in your file explorer like a network drive, and that’s where your backups live.

Why a NAS is so good for backups (and not just for geeks)

So, what’s the actual point of a NAS for backups, beyond “because tech YouTubers keep talking about it”?

Here’s what a NAS can do for you, very concretely :

  • Centralize all your files: no more “is this on my laptop, the old PC, the USB key or the external drive in the drawer ?”. Everything lands on the NAS.
  • Automate backups: your computers can back up to the NAS on a schedule. No more “I’ll plug the drive tomorrow… maybe”. It just happens, in the background.
  • Protect against disk failure (with the right setup): with two or more disks, you can mirror data so that if one drive dies, your files are still there.
  • Share safely in the family or team: everyone gets their own account, their own folders, plus shared spaces (photos, invoices, projects…).
  • Access from your phone: many NAS models offer mobile apps so you can browse your files, upload photos, or pull a PDF while you’re on the train.

In short, for backups, a NAS is like going from “box of old CDs under the bed” to “small private cloud at home that you actually control”.

NAS vs external hard drive vs cloud : what’s the difference ?

Before choosing anything, it helps to understand where a NAS sits compared to other backup options you probably already know.

External hard drive

  • Pros: cheap, simple, no setup. You plug it in, you copy files, done.
  • Cons: it’s usually used by one device at a time, easy to forget to plug it in, and if you drop it or it dies suddenly, that’s it. Game over.

Cloud backup / cloud storage (Google Drive, OneDrive, etc.)

  • Pros: off-site (protected if your home burns down or gets flooded), accessible from anywhere, managed by a big company.
  • Cons: recurring subscription, limited space unless you pay more, you depend on your Internet connection and on the provider’s rules.

NAS server

  • Pros: central storage at home, potentially a lot of space, shared between several devices, can do RAID for redundancy, one-time hardware cost.
  • Cons: you have to buy and configure it, manage disks, think about your backup strategy ; it’s not 100% “set it and forget it”.

Honestly, the sweet spot for most people is a mix : NAS at home + cloud backup for the most critical stuff (documents, photos you’d cry over if you lose them). The NAS gives you comfort and space, the cloud gives you off-site security.

How to choose the right NAS model for your backups

Ok, now the big question : with all the NAS models on the market, how do you pick one that makes sense for a beginner and for backups ? Let’s go step by step.

1. Start with your use case (not the spec sheet)

Ask yourself a few blunt questions :

  • How many people will use this NAS? Just you, or a whole family ?
  • How many devices do you want to back up ? One laptop, or 3 laptops + 2 phones + 1 desktop ?
  • Will you use it mostly for backups, or also for multimedia (movies/series), maybe small office files ?
  • Do you care about accessing your files from outside the house (remote access)?

If you only need “backup for my main laptop and some photos from my phone”, you don’t need a monster NAS with 8 drive bays and a quad-core CPU. Really.

2. Choose the number of bays (disks) and capacity

For a beginner focused on backups, the key decision is usually : 1-bay NAS or 2-bay NAS?

Here’s the honest take :

  • 1-bay NAS: cheaper, simpler, but no redundancy. If the disk dies, your data is gone. It’s still better than nothing if you also back up somewhere else (cloud, second disk).
  • 2-bay NAS: slightly more expensive, but you can use RAID 1 (mirroring). Same data on both disks. If one disk fails, you replace it and keep going.

For pure backups and peace of mind, I usually recommend a 2-bay NAS with RAID 1 as a comfortable starting point. You get redundancy without too much complexity.

On capacity : think about your current data, then multiply by at least 2 or 3. If you have 1 TB of data today, a setup with two 4 TB drives in RAID 1 (so about 4 TB usable) leaves you enough room to grow over a few years, keep old backup versions, and store some media.

3. Look at the CPU and RAM (but don’t overthink it)

NAS spec sheets can be scary : CPUs, cores, RAM, transcoding, NVMe… For backups only, you really don’t need a high-end CPU. What matters more :

  • At least 1–2 GB of RAM for a smooth interface and a few apps.
  • A processor that can handle several users at once without freezing (most modern entry-level NAS units do fine).

If you plan to :

  • run a bunch of apps (media server, photo management, sync for documents, maybe small containers),
  • or have 4–5 people constantly hitting the NAS,

then getting a slightly more capable CPU and 4 GB RAM (or upgradable RAM) is a good idea. But for classic home backups, the simpler models will do the job.

4. Network speed : 1 GbE vs 2.5 GbE

Most entry-level NAS boxes come with 1 Gbit/s Ethernet ports. That’s totally fine for backups over Wi-Fi or from a couple of PCs. Real-world speeds will be more limited by your Wi-Fi quality anyway.

2.5 GbE (or higher) starts to be interesting if :

  • you’re wired with Ethernet in your home or office,
  • you move large video files frequently,
  • you’re a photographer / videographer dumping 50–100 GB projects all the time.

But to be clear : for a beginner’s backup NAS, 1 GbE is acceptable and very common.

5. Ease of use and software ecosystem

This is where your future self will either thank you… or swear every Sunday night. Some NAS systems have :

  • a clean web interface,
  • wizards to set up backups,
  • mobile apps for photos and document access,
  • integrations with Windows Backup, macOS Time Machine, etc.

Others are more “DIY”, more flexible but less friendly if you’re starting from zero. My advice : as a beginner, pick a NAS platform known for good UX and documentation, even if it’s not the most powerful box in the universe. You’ll actually use it, instead of just admiring the hardware on your shelf.

6. Noise, power and where you put the NAS

Almost nobody talks about this in product description, but in real life it matters a lot :

  • Noise: a NAS has fans and spinning disks. In a silent bedroom, you will hear it. In a living room or office, it’s usually fine.
  • Heat: treat it like a small computer. Don’t shove it in a closed cupboard without ventilation.
  • Power usage: a NAS is usually on 24/7. Entry-level units are quite reasonable (often under 30W in typical use), but it’s still a small extra on your electricity bill.

Loosely speaking, I’d plan to put it near the router, in a place where a faint “hum” won’t drive you crazy.

Real-world beginner NAS setups (so you can picture it)

Let’s turn that abstract theory into a few concrete scenarios.

Scenario 1: Solo user, laptop + phone backups

You mainly want to :

  • back up one laptop (Windows or Mac),
  • centralize your photos from phone(s),
  • maybe store a small music or video library.

A small 2-bay NAS with 2 × 4 TB in RAID 1 would give you around 4 TB of safe space. You install the backup tool from the NAS vendor on your laptop, enable Time Machine or Windows Backup to the NAS, and set the mobile app to upload photos automatically when you’re on Wi-Fi. Done.

Scenario 2: Family home, 3–4 devices

Several laptops, maybe a desktop for gaming, plus everyone’s phones. Photos, documents, kids’ school files, some movies. Here I’d still go 2-bay, but maybe :

  • 2 × 6 TB or 2 × 8 TB in RAID 1,
  • user accounts for each family member,
  • one shared “Family Photos” folder, one “TV &amp ; Movies” folder.

You set up each computer with automatic backup to its own folder. It sounds like a lot, but after the first evening of setup it becomes invisible – the best kind of backup.

Scenario 3: Small home office / freelancer

You have client files, invoices, maybe raw photos or videos, plus your personal stuff. Losing data is not just annoying, it’s money. I’d go :

  • 2-bay or 4-bay NAS depending on how heavy your projects are,
  • redundancy (RAID 1 or RAID 5/6 on more bays),
  • local backup to the NAS + a second backup to an external drive or the cloud.

In this scenario, the NAS becomes your “central truth” for all client work, and you mirror that truth off-site.

Basic steps to set up your first NAS backup (without panicking)

Every NAS brand has its own details, but the big steps are pretty similar. Roughly, you’ll go through :

  1. Install the disks in the NAS (usually tool-less trays, honestly not that scary).
  2. Plug the NAS into your router with an Ethernet cable, then power it on.
  3. Find the NAS from your computer (often via a small “discovery” tool or by typing its address in a browser).
  4. Follow the initial wizard: name the device, create an admin account, choose language and time zone.
  5. Set up storage: pick RAID type (for beginners with 2 disks : RAID 1 is your friend).
  6. Create user accounts for each person in the house or office.
  7. Create shared folders: “Backups”, “Photos”, “Work”, etc.
  8. Install backup tools on your computers :
    • On Windows : use the NAS backup client or built-in backup, pointing to a network folder.
    • On macOS: set the NAS as a Time Machine destination.
  9. Configure mobile apps to auto-upload photos to the NAS when you’re on home Wi-Fi.
  10. Test a restore: this step is so often skipped. Delete a test file on your computer and check you can restore it from the NAS. That’s your safety net.

The first time you do all this, it might take one evening and a bit of patience. The second time (if you ever replace your NAS), you’ll wonder why it scared you the first time.

Common mistakes to avoid with a NAS backup strategy

Even with a good NAS, it’s super easy to fall into traps. Here are the big ones I see all the time.

  • Using the NAS as your only backup: if you move all your files to the NAS and delete them from your PC, but don’t back up the NAS itself, it’s not really a backup. It’s just “storage in a different box”.
  • Thinking RAID = backup: RAID protects against a disk failure, not against deletion, viruses, theft or fire. If you accidentally delete a folder, RAID will happily delete it twice.
  • Ignoring off-site backup: for your most precious data, have a second copy outside your home – cloud backup, or an external drive you store elsewhere and update regularly.
  • Never updating the NAS: like any connected device, a NAS needs security updates. Don’t ignore them for years.
  • Forgetting to test restores: a backup you’ve never tested is a backup you can’t fully trust. Restoring just one file every few months is already a big step.

So, is a NAS server worth it for you ?

If you just have a few documents and don’t care too much about old photos, maybe an external drive + a bit of cloud is enough. No need to overcomplicate things.

But if you :

  • have years of photos, videos, or client work you would really hate to lose,
  • use several devices at home,
  • enjoy the idea of having your own “mini cloud” under your control,

then a NAS server for beginners is honestly one of the best tech investments you can make. It’s not just about storage, it’s about reducing anxiety: knowing that if your laptop dies or gets stolen, your digital life doesn’t die with it.

Start simple : 2-bay NAS, RAID 1, a sane backup schedule, maybe a bit of cloud on top for the very critical stuff. No need to build a datacenter in your living room. Get that first basic setup running, and you can always refine and level up later as you get more comfortable.

And if you’re reading this thinking “ok, I’ve been putting backups off for way too long”… maybe tonight is the night you actually do something about it.

]]>
https://www.zipscan.co.uk/nas-server-for-beginners-what-its-for-and-how-to-choose-the-right-one-for-your-backups/feed/ 0
How to Choose a Trustworthy VPN in 2025: A Clear, No-Jargon Guide to Protect Your Connection https://www.zipscan.co.uk/how-to-choose-a-trustworthy-vpn-in-2025-a-clear-no-jargon-guide-to-protect-your-connection/ https://www.zipscan.co.uk/how-to-choose-a-trustworthy-vpn-in-2025-a-clear-no-jargon-guide-to-protect-your-connection/#respond Thu, 20 Nov 2025 17:22:15 +0000 https://www.zipscan.co.uk/how-to-choose-a-trustworthy-vpn-in-2025-a-clear-no-jargon-guide-to-protect-your-connection/ Choosing a VPN in 2025 feels a bit like walking into a giant tech store in London on a Saturday afternoon : too many options, too many signs shouting “best security ever,” and your brain whispering, “Yeah… but which one actually works ?”. I’ve been there. And honestly, finding a VPN that’s both reliable and not a pain to use is way easier when you know what really matters.

Before we dive in, if you want a broader look at general tech hygiene (the kind we should all do but almost nobody does), the site https://www.internet-informatique.fr has some straight-to-the-point resources I found surprisingly helpful. But for now, let’s stick to VPNs and how to choose one without getting tricked by marketing fluff.

Why you even need a VPN today (no, it’s not just for “hackers”)

A solid VPN does two simple but crucial things : it hides your real IP address and encrypts what you’re doing online. That’s it. No magic, no Hollywood-style hacking countermeasures. Just privacy and a safer connection, especially if you spend time on public Wi-Fi-airports, cafés, that weird shared coworking space with the creaky chairs… you know the vibe.

And in 2025, with websites tracking more than ever and ISPs loving to log literally everything, protecting your traffic is just common sense. It’s like locking your car : nobody judges you for it, and you sleep better.

What actually matters when choosing a VPN (the real criteria)

1. A clear and proven no-logs policy

This is the big one. If a VPN logs your activity, it defeats the whole point. Look for providers that publish independent audits. Not “we promise we don’t log anything,” but real audits done by recognized firms. When a VPN has nothing to hide, they usually shout about those audits from the rooftops.

2. Speed that doesn’t make you nostalgic for 1999

Some VPNs slow your connection to the point where downloading a simple PDF feels like waiting for the bus in the rain. In 2025, a decent VPN should support fast protocols like WireGuard or other modern equivalents. If a provider still pushes outdated protocols as their “main” one… yeah, run.

3. Servers where you actually need them

Do you want to stream content ? Access services when traveling ? Or just avoid crowded European servers by hopping somewhere else ? Check the server list. The real one, not the “we have thousands of servers” marketing line. Sometimes a provider claims 10,000 servers but half of them are virtual. Not bad, but transparency matters.

4. An interface you don’t hate using

I’ve tested VPN apps that looked like they were designed in a basement in 2007. Tiny buttons, settings hidden three menus deep, weird popups. A good VPN app in 2025 should feel clean, simple, and intuitive. You should be able to connect in one tap and change locations without opening a manual.

5. Real security features, not buzzwords

Things worth caring about :

  • Kill switch (if the VPN drops, your connection stops-not ideal for gaming, but essential for privacy)
  • DNS leak protection
  • Modern encryption (AES-256 is still standard, but some offer even more efficient variants)
  • Multi-hop if you’re into extra layers

Things you can ignore : “military-grade security” (every VPN says that), “AI-powered protection” (usually meaningless), and bizarre feature names that look like a marketing intern invented them during lunch break.

Free VPN vs paid VPN: the uncomfortable truth

Look, I get the temptation. I’ve tried free VPNs too, especially back when I was a student in Manchester and couldn’t justify £5/month for “just internet stuff.” But here’s the thing : free VPNs often pay themselves by logging and selling your data. Not all of them, but enough that it’s risky.

A trustworthy paid VPN isn’t expensive, and you’re paying for one thing : not being the product.

Quick checklist to pick your VPN in 2025

If you want the super short version, here’s what I’d personally check before hitting that “subscribe” button :

  • Has the VPN been independently audited ?
  • Does it support fast, modern protocols ?
  • Are speeds decent in your region ?
  • Is the app clean and easy to use ?
  • Does it clearly explain its privacy policy ?
  • Does the company exist in a privacy-friendly jurisdiction ?

If a provider checks at least 4 or 5 of these boxes, it’s probably solid. If it checks all of them, you’ve found a keeper.

Final thought : don’t overthink it, just avoid the obvious traps

Honestly, choosing a VPN doesn’t have to be stressful. You don’t need to become a cybersecurity expert overnight. Just stay away from the flashy “totally free !” apps, look for transparency, and pick the one that feels right for your usage.

And hey, if one day you’re working from a café in Brighton and your VPN quietly keeps your connection safe while the guy next to you tries to connect to some sketchy hotspot… you’ll be glad you took five minutes to choose the right one.

]]>
https://www.zipscan.co.uk/how-to-choose-a-trustworthy-vpn-in-2025-a-clear-no-jargon-guide-to-protect-your-connection/feed/ 0
Which Web Browser Really Protects Your Privacy? https://www.zipscan.co.uk/which-web-browser-really-protects-your-privacy/ https://www.zipscan.co.uk/which-web-browser-really-protects-your-privacy/#respond Thu, 06 Nov 2025 18:49:54 +0000 https://www.zipscan.co.uk/which-web-browser-really-protects-your-privacy/ Let’s be honest : when was the last time you thought about what your browser actually knows about you ? We open Chrome, Edge, Safari, or Firefox every day without thinking twice, but these little windows to the web collect a crazy amount of data. Some do it to “improve the experience,” others to fuel entire ad ecosystems. So, which browser really respects your privacy – and which one just pretends to ?

The Big Names : Familiar, but Not Always Friendly

Google Chrome is the obvious giant. It’s fast, sleek, and basically everywhere. But here’s the deal : Chrome is Google. And Google’s business model runs on data – your data. Every tab, search, and click can feed an enormous advertising machine. Yes, you can tweak the privacy settings, but let’s be real : Chrome isn’t built for anonymity.

Microsoft Edge, the reborn Internet Explorer, is actually much better than people expect. It’s smooth, works well with Windows, and includes some tracking prevention by default. But again, it’s a Microsoft product. The company still collects telemetry data, usage patterns, and syncs plenty of info to the cloud. Not the worst, but not the best either.

Firefox : The Veteran Defender

If I had to name one “old-school” browser that still fights for user privacy, it’s Firefox. Mozilla isn’t an ad company. It’s an independent non-profit, which already makes a huge difference. Firefox blocks third-party cookies by default, can stop fingerprinting scripts, and lets you dive deep into privacy controls. I’ve personally switched back to Firefox a few times just because it feels like a browser that’s on my side, not watching me.

That said, it’s not perfect. Some sites don’t behave ideally with stricter settings, and it can feel a little slower than Chrome on certain pages. But for privacy ? It’s solid – and it keeps improving.

Brave : The Rebel with a Cause

Brave came out swinging. It blocks ads and trackers out of the box, upgrades connections to HTTPS automatically, and doesn’t sell your data. The interface looks like Chrome (it’s built on the same engine, Chromium), but it’s heavily customized for privacy. You can even earn tokens for seeing ads that respect your data, though that part isn’t everyone’s cup of tea.

I’ve tried Brave for a few months – the browsing felt clean, pages loaded fast, and I didn’t see those creepy ads following me around. It’s one of the few browsers that makes privacy feel effortless.

DuckDuckGo Browser : Small, Simple, and Strict

DuckDuckGo isn’t just a search engine anymore. Its browser, available on mobile and now expanding to desktop, takes a hard stance on privacy. It blocks trackers, enforces encryption, and even prevents hidden scripts from sending data to advertisers. It’s minimal, fast, and doesn’t try to reinvent the wheel – just cuts the noise.

However, it’s still relatively new. So, if you rely on heavy extensions or specific developer tools, you might hit some limits.

Tor Browser : The Nuclear Option

Now, if you really, really want to go off the grid, there’s Tor Browser. It routes your connection through multiple encrypted layers (called nodes), making it nearly impossible to trace your location or activity. It’s the go-to tool for journalists, activists, and privacy purists.

But here’s the catch – Tor can be slow. You might wait a few seconds longer for pages to load, and some sites won’t even work properly because of its extreme security. Still, if anonymity is non-negotiable, Tor is in a league of its own.

So… Which One Should You Use ?

It depends on what you’re after. If you want the perfect balance between usability and privacy, Firefox or Brave are excellent choices. If you’re doing sensitive research or want maximum anonymity, go for Tor. If you just want convenience and speed and don’t mind sharing some data, you’ll stick with Chrome or Edge – but at least you’ll know what’s happening behind the curtain.

Final Thoughts


Privacy online isn’t just about hiding – it’s about control. Knowing who collects what, and deciding if you’re okay with it. The right browser won’t make you invisible, but it can drastically reduce how much of your digital life gets packaged and sold.

Personally, I switch between Firefox for everyday stuff and Brave when I’m testing or reading news. And every time I open Chrome, I can’t help but think : “Am I browsing the web… or is the web browsing me ?”

]]>
https://www.zipscan.co.uk/which-web-browser-really-protects-your-privacy/feed/ 0